【お勉強記録】WPFデータバインディング2
型コンバーター
データバインド「もと」と「さき」で異なる型になる場合があると思います。 例えば、Textプロパティに対して日付型をバインドした場合、日付型をToString()形で自動変換されたものが表示されます。

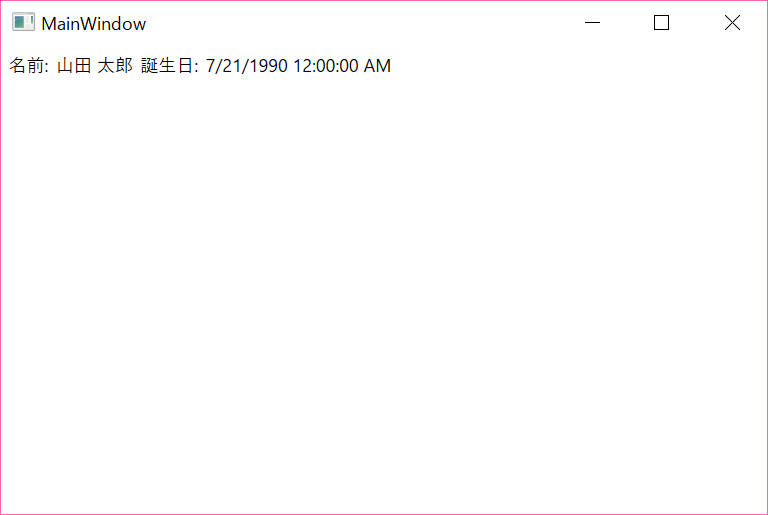
前回の例でいうとDateTime型の「誕生日」はToString()された状態で表示されていたため、日本で一般的な表記ではありませんでした。
型コンバータを使うことで、「さき」と「もと」で相互の型変換を行うことができます。 型コンバータは「IValueConverter」を実装することで使用できます。
「IValueConverter」は、以下の2つのメソッド定義を持っています。
 // 概要:
    //     カスタム ロジックをバインディングに適用する方法を提供します。
    public interface IValueConverter
    {
        // 概要:
        //     値を変換します。
        //
        // パラメーター:
        //   value:
        //     バインディング ソースによって生成された値。
        //
        //   targetType:
        //     バインディング ターゲット プロパティの型。
        //
        //   parameter:
        //     使用するコンバーター パラメーター。
        //
        //   culture:
        //     コンバーターで使用するカルチャ。
        //
        // 戻り値:
        //     変換された値。 メソッドが null を返す場合は、有効な null 値が使用されています。
        object Convert(object value, Type targetType, object parameter, CultureInfo culture);
        //
        // 概要:
        //     値を変換します。
        //
        // パラメーター:
        //   value:
        //     バインディング ターゲットによって生成される値。
        //
        //   targetType:
        //     変換後の型。
        //
        //   parameter:
        //     使用するコンバーター パラメーター。
        //
        //   culture:
        //     コンバーターで使用するカルチャ。
        //
        // 戻り値:
        //     変換された値。 メソッドが null を返す場合は、有効な null 値が使用されています。
        object ConvertBack(object value, Type targetType, object parameter, CultureInfo culture);
    }
メソッド名を見れば大体想像できますが、Convert()はバインド「もと」から「さき」へ値を渡すときの変換を、ConvertBack()は「さき」から「もと」の変換を実装しているようです。
DateTimeの型コンバータの実装
using System;
using System.Globalization;
using System.Windows.Data;

namespace _0721Study
{
    [ValueConversion(typeof(DateTime), typeof(string))]
    class DateTimeConverter : IValueConverter
    {
        public object Convert(object value, Type targetType, object parameter, CultureInfo culture)
        {
            DateTime date = (DateTime)value;
            return date.ToString(parameter.ToString());
        }

        public object ConvertBack(object value, Type targetType, object parameter, CultureInfo culture)
        {
            string strValue = value.ToString();
            DateTime resultDateTime;
            if (DateTime.TryParse(strValue, out resultDateTime))
            {
                return resultDateTime;
            }
            return value;
        }
    }
}
Convert()メソッドは受け取った値をparameterをもとにstringに変換して返しています。 ConvertBack()メソッドはstringをDateTime型に変換して返します。
xaml側を書きます。
<Window x:Class="_0721Study.MainWindow"
        xmlns="http://schemas.microsoft.com/winfx/2006/xaml/presentation"
        xmlns:x="http://schemas.microsoft.com/winfx/2006/xaml"
        xmlns:local="clr-namespace:_0721Study"
        Title="MainWindow" Height="350" Width="525">
    <Window.Resources>
        <local:User x:Key="oUser"
                       Name="山田 太郎"
                       Birthday="1990/07/21"/>
        <local:DateTimeConverter x:Key="dateTimeConverter" />
    </Window.Resources>
    <WrapPanel Orientation="Horizontal" DataContext="{StaticResource oUser}">
        <Label Content="名前:"  VerticalAlignment="Center" ></Label>
        <TextBlock Text="{Binding Path=Name}" VerticalAlignment="Center"></TextBlock>
        <Label Content="誕生日:"  VerticalAlignment="Center" ></Label>
        <TextBlock Text="{Binding Path=Birthday, Converter={StaticResource dateTimeConverter},ConverterParameter=yyyy/MM/dd}" VerticalAlignment="Center"></TextBlock>
    </WrapPanel>
</Window>
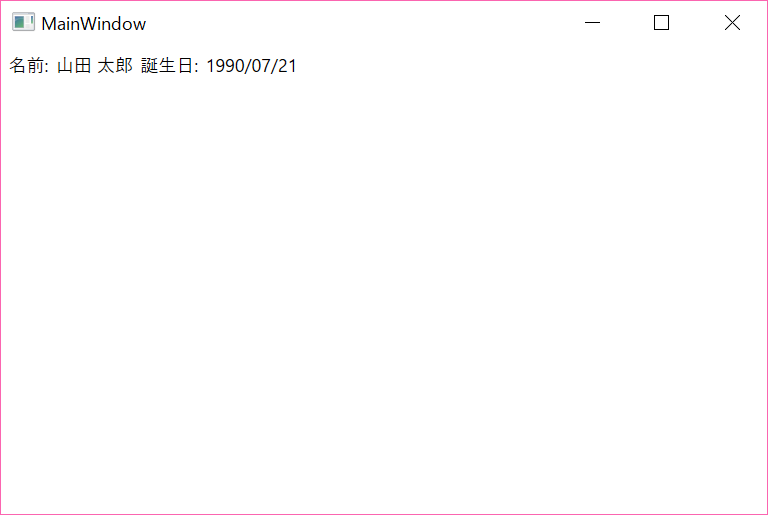
BindingでConverterにlocal:DateTimeConverter のオブジェクトと、ConverterParameterを指定しています。

実行結果を見ると誕生日がしっかり、日本人になじみのある形に変換されているのが確認できました!
【お勉強記録】WPFデータバインディング1
現在の職場においてもWPFを使って書かれたソフトがあり、ときどき触ります。
その職場で触るコードなのですが、データバインディングを行わず、 コードビハインドコード内で、直接コントロールのプロパティを変更しております…。orz
データバインディング
xaml側でのデータバインドは{Binding}を使います。
<StackPanel>
        <TextBlock Name="tbName" Text="{Binding ElementName=txtName,Path=Text}"></TextBlock>
        <TextBox Name="txtName"></TextBox>
</StackPanel>
Bindingはコード側でも実装することができます。
<StackPanel>
        <TextBlock Name="tbName"></TextBlock>
        <TextBox Name="txtName"></TextBox>
</StackPanel>
protected void InitializeDataBinding()
{
    Binding binding = new Binding();
    binding.Source = this.txtName;
    binding.Path = new PropertyPath("Text");
    tbName.SetBinding(TextBlock.TextProperty, binding);
}
CLRオブジェクトのバインディング
バインディングソースには自分で作ったクラスオブジェクトも指定可能です。
ここではユーザークラスのオブジェクトのバインディングの例でやってみました。
ユーザークラス
using System;

namespace _0721Study
{
    public class User
    {
        public User() { }

        public string Name
        {
            get;
            set;
        }

        public DateTime Birthday
        {
            get;
            set;
        }

        public string Adress
        {
            get;
            set;
        }

    }
}
次に先ほどのクラスのオブジェクトをバインドさせたxamlの例です。
<Window x:Class="_0721Study.MainWindow"
        xmlns="http://schemas.microsoft.com/winfx/2006/xaml/presentation"
        xmlns:x="http://schemas.microsoft.com/winfx/2006/xaml"
        xmlns:local="clr-namespace:_0721Study"
        Title="MainWindow" Height="350" Width="525">
    <Window.Resources>
        <local:User x:Key="oUser"
                       Name="山田 太郎"
                       Birthday="1990/07/21"/>
    </Window.Resources>
    <WrapPanel Orientation="Horizontal">
        <Label Content="名前:"  VerticalAlignment="Center" ></Label>
        <TextBlock Text="{Binding Source={StaticResource oUser}, Path=Name}" VerticalAlignment="Center"></TextBlock>
        <Label Content="誕生日:"  VerticalAlignment="Center" ></Label>
        <TextBlock Text="{Binding Source={StaticResource oUser}, Path=Birthday}" VerticalAlignment="Center"></TextBlock>
    </WrapPanel>
</Window>
実行結果

各コントロールのSource属性にStaticResourceを使ってユーザのオブジェクトを指定して、Path属性にはユーザクラスのもつプロパティを指定しています。
DataContextの使用
DataContext属性を使うことで、親要素にオブジェクトをバインドすることで子要素のバインドを一括してできるようになります。
文章で書くといまいちわかりにくくなってしまいましたが、先ほどの例をDataContextで書くと以下の通りです。
<Window x:Class="_0721Study.MainWindow"
        xmlns="http://schemas.microsoft.com/winfx/2006/xaml/presentation"
        xmlns:x="http://schemas.microsoft.com/winfx/2006/xaml"
        xmlns:local="clr-namespace:_0721Study"
        Title="MainWindow" Height="350" Width="525">
    <Window.Resources>
        <local:User x:Key="oUser"
                       Name="山田 太郎"
                       Birthday="1990/07/21"/>
    </Window.Resources>
    <WrapPanel Orientation="Horizontal" DataContext="{StaticResource oUser}">
        <Label Content="名前:"  VerticalAlignment="Center" ></Label>
        <TextBlock Text="{Binding Path=Name}" VerticalAlignment="Center"></TextBlock>
        <Label Content="誕生日:"  VerticalAlignment="Center" ></Label>
        <TextBlock Text="{Binding Path=Birthday}" VerticalAlignment="Center"></TextBlock>
    </WrapPanel>
</Window>
WPFでのMVVMを理解するためにも、バインディングの機能は必須になるので、しっかり使いこなせるように復習していきたいです。